- Pre-lab
- Introduction
- Part I: Meet the Tile Rendering Engine
- Part II: Use the Tile Rendering Engine
- Moving on to Project 3
- Submission
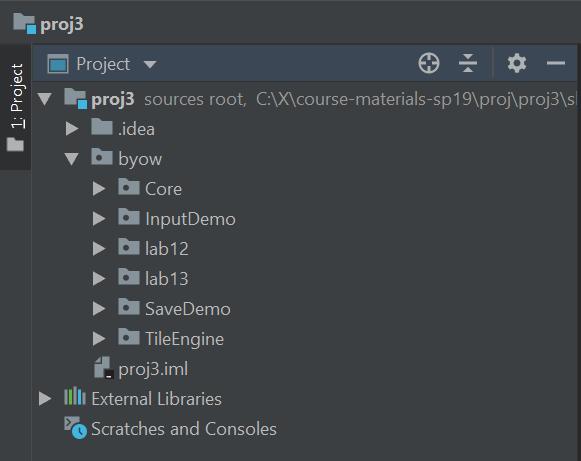
When you import, make sure to import at the proj3 directory level, otherwise there will be dumb package issues. If you import properly it should look like this.
Pre-lab
Some steps to complete before getting started on this lab:
-
As usual, use
git pull skeleton master. This should download the proj3 skeleton files, which include the files you need for labs 12 and 13. -
Watch last year’s project 3 getting started video at this link. Note the name and API have changed slightly, but the bigger picture still applies.
-
Read over Phase 1 of the project 3 spec.
-
Understand that project 3 will be a marathon and not a sprint. Don’t wait until the last minute.
-
Make sure you filled out the the Project 3 Partnership form, which was due Friday, 11/06, 11:59 PM PST. If you did, you should be able to see your partnership reflected on Beacon.
Note that you must keep the same partner for the entirety of project 3.
Introduction
In this lab, you will learn some basic techniques and tools that will be helpful for project 3. You should ideally work on this lab with your Project 3 partner.
Part I: Meet the Tile Rendering Engine
Boring World
Open the Project 3 skeleton in IntelliJ Make sure you select the folder called proj3! Not the folder called lab12. Your IntelliJ should look something like
the following (you may need to click the right pointing arrows to expand and see the contents of the byow.Core,
byow.lab12, packages, etc.). Note that there is some stuff in here, like lab13, InputDemo, and SaveDemo, that isn’t part of lab 12. That’s okay! We’ll just focus on the byow.lab12 package for now.
Make sure you also import all the libraries from library-fa20 as usual.
Open up the BoringWorldDemo file. Try running it and you should see a window appear that looks like the following:
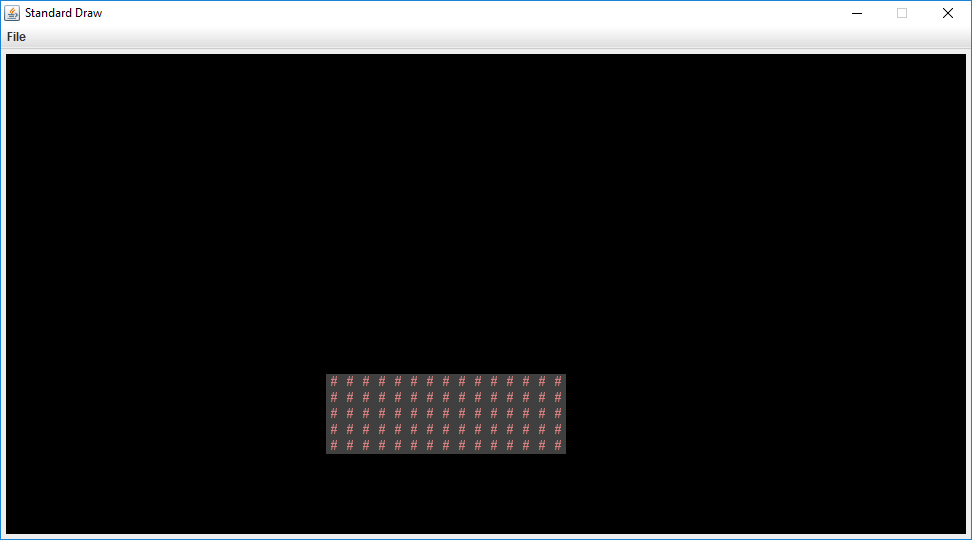
This world consists of empty space, except for the rectangular block near the bottom middle. The code to generate this world consists of three main parts:
- Initializing the tile rendering engine.
- Generating a two dimensional
TETile[][]array. - Using the tile rendering engine to display the
TETile[][]array.
The API for the tile rendering engine is simple. After creating a TERenderer object, you simply need to
call the initialize method, specifying the width and height of your world, where the width and height
are given in terms of the number of tiles. Each tile is 16 pixels by 16 pixels, so for example, if we called
ter.initialize(10, 20), we’d end up with a world that is 10 tiles wide and 20 tiles tall, or equivalently 160
pixels wide and 320 pixels tall. For this lab, you don’t need to think about pixels, though you’ll eventually
need to when you start building the user interface for Project 3 (discussed in the next lab).
TETile objects are also quite simple. You can either build them from scratch using the TETile constructor
(see TETile.java), or you can choose from a palette of pregenerated tiles in the file Tileset.java. For example,
the code from BoringWorldDemo.java below generates a 2D array of tiles and fills them with the pregenerated
tile given by Tileset.NOTHING.
TETile[][] world = new TETile[WIDTH][HEIGHT];
for (int x = 0; x < WIDTH; x += 1) {
    for (int y = 0; y < HEIGHT; y += 1) {
        world[x][y] = Tileset.NOTHING;
    }
}
Of course, we can overwrite existing tiles. For example, the code below from BoringWorld.java
creates a 14 x 4 tile region made up of the pregenerated tile Tileset.WALL and writes it over
some of the NOTHING tiles created by the loop code shown immediately above.
for (int x = 20; x < 35; x += 1) {
    for (int y = 5; y < 10; y += 1) {
        world[x][y] = Tileset.WALL;
    }
}
The last step in rendering is to simply call ter.renderFrame(world), where ter is a TERenderer object. Changes made to the tiles array will
not appear on the screen until you call the renderFrame method.
Try changing the tile specified to something else in the Tileset class other than WALL and see what happens. Also
experiment with changing the constants in the loop and see how the world changes.
Note: Tiles themselves are immutable! You cannot do something like world[x][y].character = 'X'.
Random World
Now open up RandomWorldDemo.java. Try running it and you should see something like this:
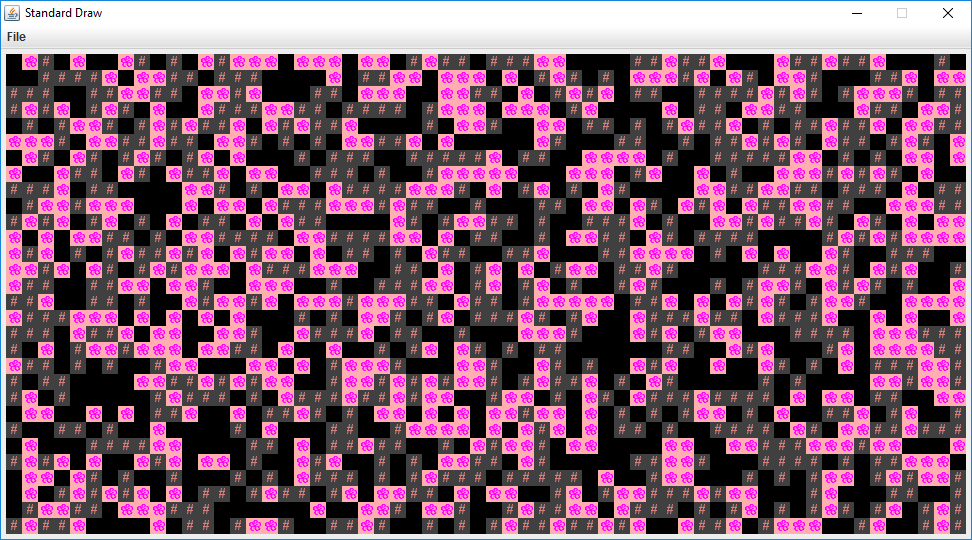
This world is sheer chaos – walls and flowers everywhere! If you look at the RandomWorldDemo.java file, you’ll
see that we’re doing a few new things:
- We create and use an object of type
Randomthat is a “pseudorandom number generator”. - We use a new type of conditional called a switch statement.
- We have delegated work to functions instead of doing everything in main.
A random number generator does exactly what its name suggests, it produces an infinite stream of numbers that appear to be randomly ordered. The Random class provides the ability to produce pseudorandom numbers for us in Java. For example, the following code generates and prints 3 random integers:
Random r = new Random(1000);
System.out.println(r.nextInt());
System.out.println(r.nextInt());
System.out.println(r.nextInt());
We call Random a pseudorandom number generator because it isn’t truly random. Underneath the hood, it uses cool math to take the previously generated number and calculate the next number. We won’t go into the details of this math, but see wikipedia if you’re curious. Importantly, the sequence generated is deterministic, and the way we get different sequences is by choosing what is called a “seed”. If you start up a pseudorandom generator with a particular seed, you are guaranteed to get the exact sequence of random values.
In the above code snippet, the seed is the input to the Random constructor, so 1000 in this case. Having control over the seed is pretty useful since it allows us to indirectly control the output of the random number generator. If we provide the same seed to the constructor, we will get the same sequence values. For example, the code below prints 4 random numbers, then prints the SAME 4 random numbers again. Since the seed is different than the previous code snippet, the 4 numbers will be different than the 3 numbers printed above.
Random r = new Random(82731);
System.out.println(r.nextInt());
System.out.println(r.nextInt());
System.out.println(r.nextInt());
System.out.println(r.nextInt());
r = new Random(82731);
System.out.println(r.nextInt());
System.out.println(r.nextInt());
System.out.println(r.nextInt());
System.out.println(r.nextInt());
In the case a seed is not provided by the user/programmer, i.e. Random r = new Random(), random number generators select a seed using some value that changes frequently and produces a lot of unique values, such as the current time and date. Seeds can be generated in all sorts of other stranger ways, such as using a wall full of lava lamps.
For now, RandomWorldDemo uses a hard coded seed, namely 2873123, so it will always generate the exact same
random world. You can change the seed if you want to see other random worlds, though given how
chaotic the world is, it probably won’t be very interesting.
The second new thing is the switch statement. We won’t discuss exactly how this works in lab, but
it’s a very handy way to avoid really long sequences of if-else statements. See the official Java tutorial for more.
The final and most important thing is that rather than doing everything in main, our code delegates work
to functions with clearly defined behavior. This is critically important for your project 3 experience! You’re
going to want to constantly identify small subtasks that can be solved with clearly defined methods. Furthermore,
your methods should form a hierarchy of abstractions! We’ll see how this can be useful in the final part of this lab.
Part II: Use the Tile Rendering Engine
Hex World Intro
Above, we’ve seen how we can draw a world and generate randomness. In the remainder of this lab, we’ll
work our way towards strategically leveraging randomness and hierarchical abstraction to generate an interesting
world: The ultimate goal is to create a random terrain generator that will
build hexagon based worlds (similar to the board game Settlers of Catan, if you’ve heard of it).
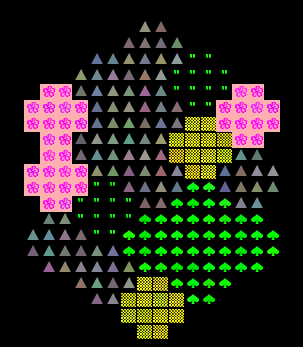
As an example, the world below contains fields of grass, fields of flowers, deserts, forests, and mountains. All your work for this part should be completed in the HexWorld class.
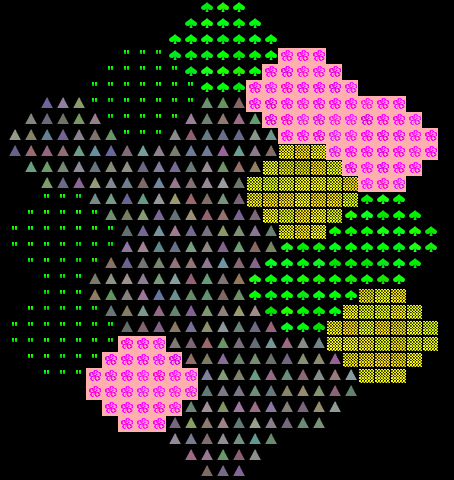
In the actual Project 3, you’ll be generating random worlds as well, although in the project, they will be indoor spaces instead of open landscapes. While this lab task does not directly apply to the project, it will familiarize you with important libraries including our Tile Rendering engine, and also help you think about how you can take complex drawing tasks and break them into simpler pieces.
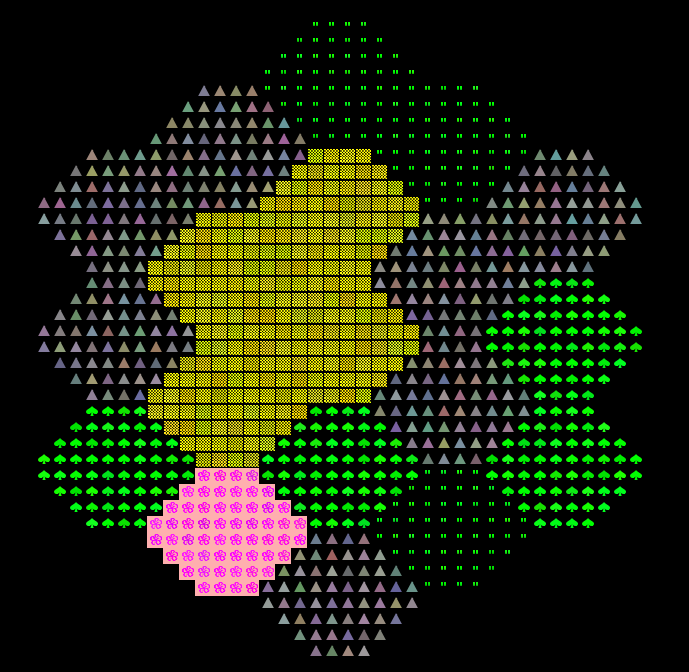
Your world should be able to support differently sized hexagons. The picture above is of size-3 hexagons, and below we see a world consisting of size-2 and size-4 hexagons, respectively.
Drawing A Single Hexagon
Start by trying to create a method addHexagon that adds a hexagon of side length s to a given position in the world.
This is surprisingly tricky! There are many, many ways of doing this, but you as you attempt to solve this problem, the most important thing is to break the task down into smaller pieces. This will probably involve creating helper methods. Example hexagons of size 2, 3, 4, and 5
are shown below. Note that your hexagon should always have a “middle” that is two rows thick, no matter how large the size (ie. the widest part consists of two rows of equal length). This is important so that the hexagons tesselate nicely.
     aa        aaa         aaaa             aaaaa
    aaaa      aaaaa       aaaaaa           aaaaaaa
    aaaa     aaaaaaa     aaaaaaaa         aaaaaaaaa
     aa      aaaaaaa    aaaaaaaaaa       aaaaaaaaaaa
              aaaaa     aaaaaaaaaa      aaaaaaaaaaaaa
               aaa       aaaaaaaa       aaaaaaaaaaaaa
                          aaaaaa         aaaaaaaaaaa
                           aaaa           aaaaaaaaa
                                           aaaaaaa
                                            aaaaa
These helper methods might involve drawing tasks, or they might involve calculating useful quantities.
In my case, I created two simple private helper methods to compute certain key quantities, and wrote JUnit tests to verify that they worked properly. I did not write any helper methods that performed drawing subtasks, but in retrospect, I probably should have.
To verify that my addHexagon method worked, I simply wrote a short main method and verified that things looked OK. Unfortunately,
writing a JUnit test to verify that you’ve properly drawn a hexagon is just as hard as drawing the hexagon itself,
so you won’t be able to built confidence in your addHexagon method in a nice way like you can with simpler methods.
Note that even deciding the addHexagon method signature is a non-trivial task! This exercise will give you a glimpse into the kind of decision-making and design thinking you will have to do in Project 3.
You can also think about making a Hexagon class. This will require some careful thinking about what a Hexagon object is in this program, what it should know about itself (i.e. what are its instance variables), and what it can do (i.e. its public instance methods).
This is what a lot of your work on Project 3 is going to look like!
Tip: If you want randomized colors for your hexagon tiles, e.g. so that not every flower is exactly the same, see the TETile.colorVariant method
This task might EASILY take the entire lab and then some! It’s OK if you don’t finish. The point is to get you thinking.
Drawing A Tesselation of Hexagons
Once you have code that can draw a single hexagon, you can try to tessellate them to form a world. Specifically, you should try to arrange them in the pattern shown below, consisting of 19 total hexagons.
As with drawing a single hexagon, there are a huge number of ways to do this. The most important part is to identify helper methods that will be useful for the task!
You should absolutely not try to do something like do everything in a nested for loop with no helper methods. While it is technically possible to do this, you will melt your brain. In this project, it is absolutely vital that you avoid the temptation to always work at a “low level”. Without hierarchical abstraction, your mind will transform into a pile of goo under the weight of all the complexity.
By writing very well-defined, nicely commented helper methods, you also make it physically possible to get help from course staff. During office hours for this project, TAs will be limited to ten minutes per pair, and will not be allowed to spend a long time getting to know the intricacies of your code. They are there for high level guidance, as well as help debugging when you’ve really exhausted all your options.
Make sure to stick around for your lab TA’s live coding demo to see the process we used to tackle this challenge!
Moving on to Project 3
In theory, this lab has taught you everything you need to know for Project 3! The process of generating your world will be similar in many ways to drawing a hexagon world, though Project 3 world generation will be considerably more complex. Read over Phase 1 of the Project 3 spec. Take a look at the questions in project3prep.md. Feel free to discuss with your partner or a TA before jotting down your answers.
Submission
You’ll be submitting your completed project3prep.md file to Gradescope.